This chapter presents the essentials of the design process for lawyers. It walks through the design process flow — and the behaviors, steps, and tools you can use to develop new interventions like a designer.
The Essential Design Process
You have an idea for a new product to build. Or, you have a problem that you know needs solving.
Now you need to get from this idea or this problem statement, and figure out how to tackle it — or discern if it is worth pursuing. How do you get from this inkling that something could be better, to launching a thing that will solve a problem for people?
Going through a design process can lead you from an idea to a strong, vetted, grounded concept of what product you should build. It’s the first cycle of actions to take, to figure out what you should be building, how to make it great for your target users, and how this thing could be scaled up.

The design process is not a strict recipe — though it can be useful to learn it through a formulaic set of stages. As you go through more cycles, find your own preferences, and see the different values and activities of each stage — you can make the process your own. Each challenge can require a different variation of the design process, to fit your own skills, the needs of your user, and the type of problem you’re trying to tackle.
Here is a gallery full of different ways to practice the design process that I’ve created. Notice that it can take many specific forms, but its general flow is fairly standard. It is a process-based approach, with some discrete steps to follow. Depending on the individual designer or the project needs, the steps to be used could vary widely in what length, what order, and what priority they’re given.
As these diagrams show, the design process can take many different forms in practice, with different kinds of deliverables and points of focus. But the main flow of all these processes are the same. A team starts by understanding users’ needs and the challenge area, then comes up with lots of ideas, narrowing down to the most promising ones to build quickly, test quickly, and then scrap/refine/iterate until they get a successful design to scale to a more robust & real implementation.
This chapter fleshes out each of these stages in the design process, with tools and details to make it clear how they can be used in whole or in part.
[gap size=”80px”]
Stage One: Discovery and Understanding
The first stage of the design process is to Understand the Status Quo of the people and the system involved in the challenge area you’re tackling. Ideally, this stage will be undertaken with a great deal of empathy for the people in the system, in order to understand it from their perspective.

The idea is to begin broad — keeping the problem undefined and the topic wide open — as you begin to understand the terrain from the point of view of those directly involved in it, as well as from the experts who research it. The designer must know the challenge situation — its systems, its users, and its current workflows — before she decides what precise ‘problem’ she will tackle. To do this, the designer has an arsenal of research tools.
- Interviews with stakeholders
- Consultations with subject matter experts
- Observations of the challenge area contexts
- Ethnographies of the stakeholders
- What-if exercises, to play with what could be improved & what implementations might be possible
Who are your stakeholders?
In this first stage, the designer’s goal should be understanding who ‘the user’ of your design will be. The user is the person who is the main target of your product, service, organization, information, or system. She is the person whose problem your design will be addressing.

We use processes that draw from the humanities & social sciences in order to gather this information from stakeholders and then scope it down to a more defined problem statement. To discover insights and to generate promising concepts, we focus on observing users in context, engaging them in conversations and discovery exercises, and playing around with what opportunities there might be for breakthrough change.
To know your user, you must engage in user research inside the problem area you’ve scoped. The mindsets laid out in Chapter 2 all come into play — especially those of embracing a beginner’s mindset, having a hunger for stories that reveal deeper needs, having empathy for others’ points of view, and scouting extreme and specific users rather than generic composites.

To carry out user research, there are many methods, props and tools to use:
- Interviews & storytelling. Perhaps one of the easiest in theory, but hardest in practice methods, getting people to tell you their stories about their experiences can be one of the richest ways to understand their perspective.
- Observation. Watch the product or service in action, like a fly on the wall. Take lots of notes and observed from many different perspectives at different times and different settings.
- Walk-a-Mile. Experience the product or service yourself, as different stakeholders. Pretend that you have a need for this product or service, and try to begin with it, go through the process, and achieve some kind of outcome. Or pretend that you are the professional, who’s supposed to be delivering this product or service, and see what it’s like from their perspective.
- Service Safari. Like an ethnographer or an explorer, go to a service and try to understand it from the inside out. Talk to the people who are involved, watching the wings and see how it works, try to find patterns and small behaviors that are going on. For example, head to your local Starbucks and start to notice everything that the store has done to create a certain experience for the customer, and then watch the many different customers and how they proceed through the service. Try to notice really tiny things, as well as the more standout patterns.
- Personal maps. Have your user draw out how they see the system they’re a part of, and what they like, they don’t like, and wish it were. They can convey their point of view and their own journey through the system using visuals, rather than just describing it.
Of these Discovery tools, interviewing users is the most popular and obvious. But other than talking to people, there are other tools to use to get to their motivations, preferences, needs, and opportunities. Observation, service safaris, and walk-a-mile research can show you how people actually behave in context, rather than how they think they do, or wish to represent themselves. Observing behavior can tell you much that an interview won’t.

Tools like the personal map can also provide rich insights. Their value lies in seeing the stakeholders’ point of view through more creative ways — without expecting them to fully report their needs and aspirations in an interview.
We use probes, provocations, and small exercises to prompt our target stakeholders to figure out what new kinds of services or products might serve them. That might mean having them draw out a diagram or story; lay things out on a timeline or schematic; or simply interact with props we give them.

These kinds of directed user research exercises can uncover things that normal conversations don’t. Often they help you understand a person’s mental models, because they are demonstrating them rather than describing them. They balance out data you can gather from interviews.
How to gather information in the field
Aside from interviews, focus groups, and creative exercises, how can you gather information about your users and challenge area in the field? Investing in fieldwork research can be expensive, but it will provide much richer information about how people are behaving.
As you set out to hear from your stakeholders, we suggest taking on the role of a talk-show interviewer (the Teri Gross) or the hyper-curious kid (the Kindergartener).


You should be questioning everything, with a profound and non-judgemental curiosity, and tuning into the person you’re speaking with at the most fundamental leve..
As you talk to people, the point is to dig into deeper themes, illustrative stories, and actual behaviors. Your job is to get past generalizations. That’s why asking ‘why’ is so key, as well as for ‘examples’. These questions will help you find needs to solve, and intervention points for new designs.
What kinds of questions can you ask in an interview? You can use a combination of these patterns:
- Walk-through questions: “Walk me through your typical ____…. What do you next? … And then…”
- Example questions: “Last week, for example. What did you do last Thursday?”
- Comparison questions: “Do other associates at your firm do the same thing?”
- Worst/Best questions: “Tell me what your worst experience with __ was.” “Tell me about your best experience with ____.”
- Over time questions: “How are things now, as compared to a year ago?”
- Diagram questions: “Can you sketch out a map of your daily interactions at the job?”
- Controversial opinion questions: “Some people think this ____. What do you feel about that?”
- Future speculation questions: “What do you think would happen if…?”
When you’re doing formal sit down interviews, or more in-passing conversations, here are some strategies for getting the most out of your talk.
- Start with naive questions, like “Tell us about…”, or “What, how, who, or why?” Avoid binary questions. Go for questions that will lead to stories.
- Don’t suggest answers to your questions, and don’t ask questions that have answers baked in. Stay away from any sense of judgment or ‘what’s normal’. Let the person you’re speaking with define that.
- Have paper and pen handy, to let your respondent sketch things out — map or doodle. These can be useful complements to the spoken conversation.
- Be aware of other cues, in their behavior, face, movement, and other nonverbal indicators. If you sense there is some tension or resistance, ask the person if there is something else going on. Try to spot where there are tensions, inconsistencies, or other curious things going on — and inquire more about this.
- Go where your user takes you — let them dig into stories and explanations — but steer back to your fundamental challenge area if it goes far afield. It’s a balance you’ll have to find, especially if you’re speaking with a person who’s eager to tell you stories and take the lead of the conversation. Use their willingness to talk to understand their perspective, but be sure to keep the conversation linked back to your fundamental questions.
- Scout patterns. Try to see if there are common themes or trends in what your user is telling you, or the underlying dynamics at play. You can ask them if they see the pattern too.
- Don’t fear the silence. If there are passages of quiet, let it go, and this might prompt your user to talk even more, and open up even more.
- Your back-up question, if your mind ever goes blank, or the conversation seems to be fading — is why.
The biggest metric for a successful interview is who is doing the talking. You as the design researcher should speak very little — just to set the guidelines and give prompts. Otherwise you should be quiet, and your respondent should speak 90% of the time you are together.
Complementing talk with observation
Along with your interviews, try to invest in ethnographic research. This will help you understand routines, and from the point of view of the people — and not just your own. As you observe how people behave, you can uncover user’s needs, cues, and emotional valences. It will indicate not just how they describe themselves and their actions, but it will point you to why they are doing what they actually do.
The more time spent observing the stakeholders like an ethnographer – watching, listening, discussing, and seeking to understand each type of stakeholder – the more the team will uncover. For as valuable as interviews are, most people can’t articulate what they actually need or are missing. The design researcher needs to act like a detective, observing people’s actions to find patterns, gaps, inconsistencies, and opportunities for new design interventions.

By using Service Safaris, Walk-a-Mile, and other ethnographic observations, the designer will see how people behave in context. They can observe where the service is inefficient or frustrating, where people get lost or fall away. They can also see what people enjoy, where they are engaged, and where there are potential ‘hooks’ for new interventions to improve the service even further.
This branch of research also helps you tease out what your stakeholders actually do and want, versus what they report that they do and want. How people describe themselves does not always correspond to how they act. Ethnographic work will supplement interviews and focus groups, with data from the field.

Ethnographic needsfinding will help you see implicit needs, that are deep, hidden, and not immediately obvious to the people themselves. You as the design researcher can combine what you hear in interviews with what you see in ethnography to figure out what is important in a situation, what values and meanings are at play, and what some more buried, hidden, but crucial problems need to be solved. It’s your job to make sense of what you gather in the the field, to get from basic questions to deep understanding of what’s going on in a challenge area — and where the opportunities lie.
Rather than just relying on interviews or focus groups in the context-free lab, ethnographic work lets the design team see their target users in the context that the team is trying to correct. This will help the team see users’ unarticulated needs and preferences that will inspire the design process.
Questions to ask, Things to learn
Whether in the field or in a lab, when you talk to your stakeholders, it’s key to know what you’re trying to figure out, and what questions will get you the richest answers. Find out who your users by answering the following questions about them.
- Who is using the system, service, or product you are trying to redesign? What is their age, their professional track, their education level?
- Where are there disconnections, failpoints, frustrations, or other problems for this person in the system?
- Where are they happy, empowered, and successful in this system (if anywhere)?
- More generally, what are their values, their preferences, their aspirations?
- What do they spend money on? What do they wish they could afford? What brands and products attract them?
- How do they approach tech? How does it work into their routines? Are they adventurous or conservative when dealing with software?
- What do they hate, what frustrates them, what pisses them off, what is ugly to them?
You can ask them these questions directly. You can observe them in the field to answer them. Or you can devise creative exercises and probes to unveil them. Answering these questions helps you understand your users’ needs and requirements for the given context.
They should also reveal broader concerns about your user. For instance, what is your user’s mental model? How do they like to intake information, (generally, and in the specific mode they’re in when dealing with the challenge area you are considering). How do they phrase or understand the system?
Also, what kind of mode are they in? For legal designs, to intake complex information and take on difficult tasks, it is important to know if the user, in the given context, is in bullet or browse mode. Are they in browse mode, where they want to meander through information to find something interesting? Or are they in bullet mode, where they want to find a specific answer to a query that is at the front of their mind & is pressing down on them? Knowing this will be key in designing something that works in their context.
During this Discovery stage, the design team must take care to reserve judgment and stay open-minded. The stakeholder should be considered as the expert. You as the designer want to understand her and her mental models. In the next phase, you can analyze it critically — but this initial phase is about impartial gathering of as much information as possible.
Getting answers to these questions will help you in the next stage, of Synthesis, to decide where your design team should focus its efforts, and what types of solutions would best serve your users. As you gather information, the design process should help you step aside from your own in-built biases, assumptions, and preferences, to begin to see the system through your stakeholders’ point of view.
[gap size=”80px”]
Stage 2: Synthesize
The synthesis stage is when the designer considers all the information & insights they’ve gathered about their users, the other stakeholders, and the systems they’re embedded in.

This stage is about moving from all of this abundant information to a more focused Design Brief, which frames the challenge that the rest of the design process will be focused upon.
Here is one flow chart I made of what one type of Synthesis phase of activities could look like in terms of tasks and deliverables.

Methods to use when synthesizing
After you have done fieldwork and research about your users’ situations, then it’s time to make the material useful to the rest of your design process.
Synthesis is all about creating deliverables. While the Discovery phase is about collecting huge amounts of information, this stage involves whittling it down into more focused, patterned documents. These will guide the rest of the design process, so they should make the information clear, prioritized, and targeted.

Some of these synthesis deliverables include the following.
- Mapping the Process, user journeys, and emotional flows
- Blueprinting the status quo workflows, with their schedules, locations, and actions
- Flagging touchpoints, opportunity areas, design hooks
- Profiling and mapping the stakeholders involved in the context
All of these deliverables involve processing research data into guiding insights. Some of the tools to get these synthesis outcomes include the following.
- Mindmap
- 2×2 matrix
- Persona documents
- Emotional journey maps of personas
- Needs charts
- Storyboards, User Stories
This gallery displays some templates for these different maps and tools. They can be used to make sense of what you’ve heard. It can also lead you from just understanding and empathizing with your stakeholders, to begin crafting hypothesizing about what type of intervention might work for them.

[gap size=”80px”]
Tools to Map the Status Quo
Most of these tools are about mapping. They are iterative tools, meaning that a design team will lay out specific observations, data points, and research materials that they gathered during Discovery, and make it more ordered and meaningful on the map. The map can be culled, reordered, and changed until it makes sense.
These types of maps could take several forms. Two of the most useful ones are the Journey Map and the Service Blueprint.
A journey map documents how a user proceeds through the status quo service on offer right now. It categorizes the different stages the user goes through what value she gets out of the different stages, and what her beginning and endpoints are.

This Journey Map can also be graphed alongside the user’s emotions. It can show, over time, and in different contexts, where the user is in a positive stage versus a negative one. This graphed map can focus your team on failpoints to solve for, or highpoints to use as hooks for successful designs.

A service blueprint focuses more on the service provider and system, and is not so much defined by the end-user’s point of view. The service blueprint shows how different service providers all interact to deliver a single user complex service. It shows the backend of how the different service providers interact, where the user experiences touchpoints of different providers, and how resources are shared among the providers.
[gap size=”80px”]
Tools to Understand Your Users
Personas & User Archetypes
After you’ve interviewed, observed, and gathered information about the people involved in the problem area — then it’s time to start defining who your users are.
The persona document is an essential synthesis deliverable, to define who the target of your design process will be. Your team should know who might be using your design, what they value, and what they need. To make this decision, you can ‘user archetypes’ or ‘personas’. These generalizations of actual people will guide the rest of your design process.

Make it clear who your user is, what she aspires too, what her backstory is, what her needs and goals are, everything about her that can help you design a better service to meet not only have functional needs but also the keeper her deeper value driven and emotional needs.
This will help you understand your user so that you can design optimal service for her. This persona can help you make better choices when it comes to let products you offer and how you deliver your services. You can make generalized personas as long as they are still defined in specifics.
Of course, there could be multiple users — not all products will have just one user. Your design could apply to multiple different types of users — use this document above to identify & characterize these main user personas.
Needs Pyramid and Value Map
Another unpacking tool is a Needs Pyramid. Looking at the user research you’ve gathered, map out what your stakeholder requires and needs. Use the pyramid form to impose some hierarchy onto it. The most peripheral and passing go into the bottom-most section of the pyramid. The most important one or two go in the top section. This should help you prioritize among the needs you’ve heard.

Related to the Needs Pyramid is the Value Map. Here you lay out what your target users’ have said they care about, or what you’ve observed that they value. It could be specific outcomes or more abstract concepts.

These are not needs as much as aspirations. On this map, you should understand what progress your target user wants to make, what they aspire to be, and how they would rather be doing things. Instead of focusing on problems and needs, this exercise looks at a longer horizon and deeper emotions.
[gap size=”80px”]
Tools to Craft Your Design Brief
As you begin to see what part of the given system you want to focus on, and what users you will focus on, the final part of Synthesis work is to craft a design brief. This defines the specific problem you want to solve in your design process, or what outcome you want to achieve. It takes the broad challenge and frames it to a specific user and part of the system.
User Stories, Use Cases, and User Requirements
One way to bridge the user definition to the design brief is the User Story. The User Story narrates how a person will use a new product or service to accomplish something they need. It’s a clear, readable document of where your user is coming from, and a vision of what their ideal scenario would be.

It doesn’t actually define what the solution is for the user, but it rather lays out where they come from and where they get to. As a story, it can be a guide and a metric for your design work.
As your team writes out these short User Stories, you will likely create multiple ones. These will be your different Use Cases, that show how different types of users, or users in different contexts, will use your solution (whatever it might be). You can define a shortlist of what Use Cases your single solution must address. This will make you aware of the multiple functions your intervention must work for.
A final, and essential, synthesis deliverable is a User Requirements list. This ‘User Reqs’ document serves as a clear synthesis of what your design team has learned, that you can hand off to any developer or partner so that they ‘get it’. The requirements list serves as a prioritization and constraint tool, to keep you grounded in your user’s needs and aspirations as you start into your brainstorming and building (and away from your stakeholders).

Your User Reqs should include “Must Do’s” and “Must Not Do’s”. It is the user’s metrics about what a good solution versus a bad solution would be. It should take note of:
- what the user cares about in this system or context,
- what they need,
- how they like to receive information,
- how they prefer to interact with others,
- what their tech skills and practices are,
- what money concerns or limits they have,
- and any other main constraints or preferences your research uncovered.

This User Req list can be one of the most important Synthesis deliverables. It can act as your guiding commandments in the following stages, when you must focus in and make smart guesses about what will best work for your users.
The Design Brief
As you’ve thought through user stories and requirements, you’ll have been circling around your brief. It’s worth creating a one-sentence encapsulation of the problem — this will be your brief to use in the next stage.
Here are some examples of generic design briefs. They lack specific user and challenge details, so they need to be contextualized. But they give you a general sense of what a design brief can look like.


If the team is particularly stuck about what type of design brief to create, doing problem maps can help you think more systematically about what problems are possible to choose, and which one is at the right level for your work.

Mapping out the problems will help you explore whether your team should be tackling one of the deeper causes, or the secondary effects — or, ideally, trying to find a balanced point in-between.
Problem mapping is done by putting your best guess at the key problem at the center, and then going up and down. The up-down vector might be what is the cause of this central problem, and what is the effect of it? Or it could be why and how, meaning why is this a problem and how does it manifest.

These maps can lead you to frame a challenge in a better way, or go after deeper causes that aren’t immediately clear as the ‘real’ problem.
Once you’ve figured out where you want to focus, then the final Synthesis goal is to write a one-sentence Design Brief.
The mad-libs version of the Design Brief typically is as follows:
How might our design team help [short user description] [achieve/deal with/resolve] [description of short-term problem/opportunity/outcome] because [why this problem matters in long-term to user or to system].
That may sound difficult to craft, and it can be. This is a moment of focus that can lead to disputes in a team, about where the design process should be targeting. We tend to list out many possible design briefs before choosing the one to use. We can also use multiple design briefs in our next stage of Brainstorming, and see which one produces the best ideas.
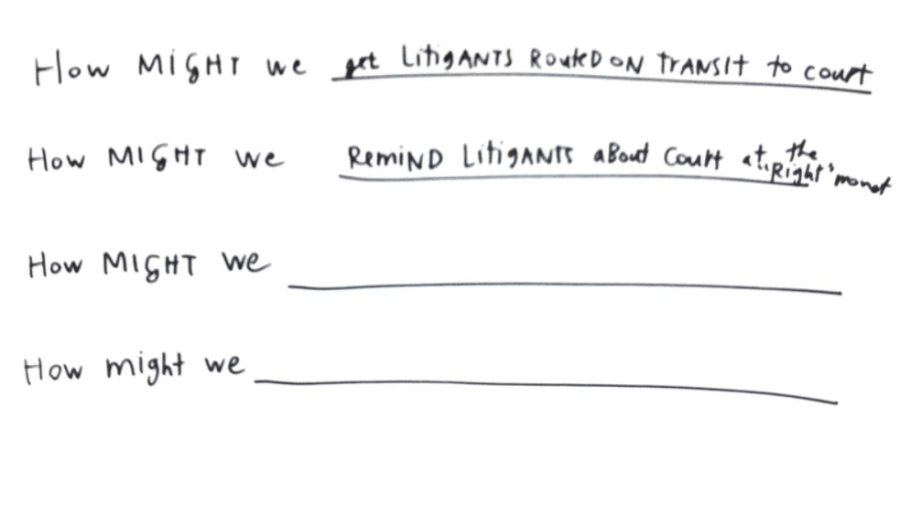
Your How Might We? design briefs will be essential jump-off points for the next stage. A good brief will not have the solution baked into the question. It won’t say that a new app, or a new form, or a new organization is the solution — that is restricting the design process to a determined outcome.
The design brief should have a verb as the focus rather than a noun. Meaning, if your brief says “How might we build an app that helps the user?”, it is over-defined. Rather, it should look something like “How might we help the user to navigate a confusing system?” This type of brief doesn’t limit the solutions to just an app — it is open to many types of tools, system changes, or services that could assist the user in navigation.
From Synthesis Towards Building
The goal of the Synthesis stage is to focus in on what your design team should be working on, and be able to explain the challenge situation and user needs to any future partners or team-members. What you create in the Synthesis stage — all these maps, lists, and documents– are key deliverables to keep your team oriented through the rest of the design process.

[gap size=”80px”]
Stage 3: Brainstorm & Build
The third stage is where your team creates ideas and prototypes them out. This stage is about being generative and constructive. It is where ‘ideas people’ thrive, as well as tinkerers and builders.
Despite what most lawyers tend to do, creativity is hard to come by when sitting around a giant table with other people. We cannot come up with great ideas as we are sitting around a boardroom table — even if we are smart, bright, and invested in figuring out new ways to solve a challenge.

I realize that still most lawyers will brainstorm this way. The boardroom table is too comfortable and convenient to be displaced very easily as a workspace. But if we can displace it — or at least modify it — we can get much richer and unexpected ideas.

The brainstorming techniques I’ve learned at the d.school, and then practiced and honed with legal design workshops, can help your team tap into your own expertise, and that of your colleagues from both inside and outside of law.
Ground Rules for Good Brainstorming
Here are some general rules that we use at the d.school as we brainstorm. These help us to brainstorm a multitude of ways to solve the problem for the user you’ve defined.


These basic rules should be introduced before the brainstorm begins, and posted up on the wall to keep everyone oriented.
It’s easy to slip into bad behaviors, like splintering off into small groups, ignoring others’ ideas when you get excited about your own, and having group conversations rather than writing the ideas down. Brainstorming rules are healthy constraints for productivity, team cohesion, and spinning out new ideas rather than predictable ones.

A brainstorm facilitator must craft the right scene to get the energy levels up to where good brainstorming happens. Sugar, caffeine, music, warm up exercises: they are all good fuel for ideas to start flowing. People should be standing, moving, milling — not seated and static.
Added to that is the space. No devices, no screens, no distractions, if possible. Everyone should be around the same surface, and everyone should be equipped with post-its and sharpies to be doing the writing themselves. It’s about high-level energy, tuned-in to the group, and everyone participating. There cannot be a single ‘secretary’ listing things out, while others dictate their ideas.

The act of the entire team sticking up ideas, building off of each other, and going quickly back-and-forth with their thinking is where the magic can happen. The best brainstorms are collaborative and energetic,with people improving each other’s ideas, uncovering wild new directions, and bringing in unexpected analogies and ways of thinking.

In addition to sticking up ideas on the wall, you can also act out scenes that your users experience, to arrive at new designs. Harnessing the power of improvisation, you can locate your brainstorming in the scenes and contexts you observed during the Discovery phase. Then your team members can play different roles, and improvise how to act and resolve problems.

Scouting Analogies, Pattern Libraries & Inspiration
A secret of designers is that they do not invent things off the top of their head, or produce gorgeous work product from their mind’s eye. Most often, they’re starting from others’ work. They borrow, they use pattern libraries and stencils, they draw from other designers’ creations. They use this inspiration material to remix into new concepts.
That means that aside from brainstorming, your team should invest research what existing Pattern, Models, or Templates you can borrow from.
You should be simultaneously scouting who else is (or has been) trying to solve your same challenge. This can be directly inside your field, or an abstracted version of your challenge in another field.

See how others are trying to solve the problem contained within your design brief, and identify the patterns of their designs.
You can borrow these — assemble a pattern library and mark up what of these others’ work are inspirational, and which are anathema. Shape your own ideas & design choices by reacting against others’.
Don’t copy them — but make them better and custom to the situation at hand.
Choosing an idea
Once you have a wealth of ideas from your brainstorming, now it is time to choose which ones you want to pursue. This is one of the most difficult points of the design process, where teams need to come to consensus about what the direction of their work will be.
To facilitate this (often painful) decision-making, there are two tools to figure out which ideas have the most promise for your users and that you can actually build. They are the Importance/Difficulty Matrix and the Bullseye.
Take your ideas that you’ve generated and gathered, and then lay them out using these schematics.
For the Importance/Difficulty matrix, make a 2×2 matrix on the wall, with Importance as the x-axis vector and Difficulty as the y-axis one. Then divide into four quadrants. As a team, lay out your various concepts on the matrix. Discuss together feasibility, priority (from your users’ point of view, as well as from stakeholders’), and viability of ideas. Use the matrix to facilitate the choice of your ideas. You want to go with ideas that are High Importance and Low Difficulty typically.

Or even more directly, just lay the ideas out into Primary Importance, Secondary Importance, and Tertiary Importance, using the circles of the Bullseye diagram. Like the 2×2 matrix, it will help you slough off ideas that you should abandon now. The best ideas will be at the center.
In this process of focusing in and sloughing off, it’s still worth documenting all the ideas. They will be a resource later down the road when you’re prototyping and iterating. These abandoned ideas might be of use when you need to change course with a different set of features on your ultimate design, or if you need to abandon your chosen idea and pivot to another one.
The brainstormed ideas are a precious resource, so make sure they don’t end up completely in the garbage (though most of the ideas should be shelved at this point, to prevent an overly complex and confusing prototype).
Prototyping
A key and exhilarating step of the design process is prototyping. At early stages, you should generate lots of low-fidelity prototypes of what your idea will be.

At first the prototypes you build will be a continuation of your brainstorming. As you try to build stuff, it will help you come up with more ideas & make them more concrete. After some rounds of these low-resolution, brainstorming prototypes, you’ll be moving on to prototypes that will be closer to a final-ish design that can actually solve the problem you’ve scoped.

Low-Fidelity Prototypes
Some more tools for you to be using to make your ideas richer & clearer, without investing anything besides time, thought, ink and paper are the mindmap, the 8-frame storyboard, and the user-journey map. Some of these will be familiar from your Synthesis work — but here they are adapted to document future scenarios rather than current ones.
By capturing your new concept in sketches and scenes, you will make it concrete. You will also whittle away extra features or complications, to make it clearer what you are actually developing and what the most valuable functions and features are. This can ward off mission-creep, in which a team starts to overload a given prototype with other ideas (often, all the post-its from the brainstorm, mashed together). Boiling your idea down to a simple prototype will make your value proposition clear.

8-Frame Storyboard
An easy way to generate low-fidelity prototypes is to sketch your idea in 8 scenes. It could be 8 screens of your app or website. Or it could be 8 scenes of your new service, document, or organization in action. The eight scenes should document where your user finds the product, through how they use it, and how the product resolves their situation
 How to make an 8-scene prototype? Take a piece of paper — the bigger the better, and fold it into 8s. Each of those 8 panels needs to be filled up with different parts of how your target user will encounter, use, and move on from your concept.
Do a few of these 8s — you will start to get the right balance and moments to focus in on. You can reserve Panel 1 for introducing your person and her problem situation, and Panel 8 for saying goodbye to your person in her more satisfied, problem-resolved situation.

User Journey Map through your concept
You can also map out your user’s journey from problem to resolution using a journey map. Identify who your user is before — with notes on their problem situation. Then note what ‘touchpoints’ your user will have with your design. Finally, note who your user is after engaging with your design — what is different now?

Now think about situating your design in your user’s life. When will she use it — at what time of the day? What point in a week? When during a month? What season of the year? And what point in her entire lifetime. This exercise — even if it’s just zones and not precise points — will force you to situate your design in specific contexts.

Concept Poster
Another early prototyping tool is to make a one-page poster of the concept you want to develop.

The concept poster is one of the easiest, quickest, (and lawyer-friendly) prototypes to make. And its entire goal is to help the team think through exactly what they want to build — getting from the vague post-it version of a concept, to a more specific and viable version of it.
[line]
Early, rough prototypes will focus your team on a single, stripped down concept for what you should build, and contextualize it to a specific intervention-point. You will think through the specific situation in which your target user will encounter and use this thing you’re building.
[gap size=”80px”]
Stage 4: Test, Iterate & Scale
In this part of the process, you will put your young ideas to test, gather feedback, and start refining them towards a more finished, and promising version. Or, you might scrap ideas that don’t turn out to solve the problem for your stakeholders, and return to your earlier bank of ideas
In this stage, building and testing should be going on near-simultaneously.
As you build out your idea (even in sketches and rough-and-ready formats), you should be testing immediately. Testing early will help you sift through the many ideas you’ve brainstormed to find the most promising ones. And continuous testing throughout the process will refine your design choices, your focus, and what features, styles, and functions you offer with your design.

Testing
Testing is hard but essential. It will tune you back into your users’ needs, confirm or negate hypotheses you’ve played around with during synthesis and brainstorming, and prevent you from wasting your precious resources or runway.
Oftentimes, testing can crush your spirit. Hopefully this will be temporary. You will hear that your great idea that you worked so hard to brainstorm, refine, and build into a prototype is completely unappealing to your target user, or perhaps they don’t understand what it’s supposed to do for them. They may find it confusing, unappealing, or without value.
Your first reaction may be that they just don’t ‘get it’ and don’t appreciate how thoughtful and great it is.
 But their critical reaction is good news. Feedback is a gift that you should welcome more of, because it will keep you on track to making something that people will actually want to use, love to use, pay to use, and recommend others to use.
You should continually be asking yourself — and your users — if this product or service is worth developing. There are three main areas for user testing to investigate: usability, usefulness, and value. You cannot start this testing along these metrics soon enough.

Some people choose to go ‘stealth’ with their design process, and don’t show their concepts and prototypes to anyone for their feedback. You may feel this is necessary for your business model or to protect yourself from competition.
Can you find a way to still test internally, or (better) with people outside your organization, but without fully disclosing your product & business plan? It’s tempting to keep your process stealthy, but the risk is that you won’t have crucial validation and momentum around your design.

I have created some reviews to use on your own projects, to determine if it has a good user experience — or where you might need to focus more design work.

Apart from the checklist, here is a design review matrix I made for student teams in my class, to give them feedback as they pitched their project midway through the class.

And finally, here are some of the common pitfalls that have observed in early stage prototypes in many of the workshops that I’ve run.
The main failure is not in boiling the need or the concept down enough, and ending up with an over-stuffed and tangled concept which is hard to grasp and unlikely to succeed.

Or, the other failure: being too ambitious about the technology that’s available today, and banking on magical tech to accomplish tasks that there’s currently not capacity for.
Making Use of Critical Feedback
After you’ve subjected your great prototype to bruising feedback sessions, you might be left with a pile of notes. You’ll have post-its full of recommendations, random comments, new ideas, and a grab-bag of other thoughts jotted down.
What can you do with the feedback to make it useful to your forward-motion?
Here is an Iteration Plan that I’ve used in my classes, to help teams divide up the feedback into four different categories (one for each of their main deliverables), and then respond to the different pieces of feedback.

Another option — one that I encourage my students to be cognizant of — is Non-Action. What if you scrapped your design and your design process completely?
What if the situation is not calling for a new product, service, or organization — but really another kind of intervention?
It’s tempting once you choose to go down a route to think that you are the one to solve this problem: I will come up with the great new idea that will solve all the problems! But it’s important to scout out if there are already good things going on that other actors are sponsoring. Perhaps you should be deferring to them, pointing user to them. Can you really contribute to this challenge area? Are you the person or team to do it?

[gap size=”80px”]
Stage 5: Scaling, Evolving, Implementing
If your team does get good feedback for your concept, and you set out the plan of how to make your prototype into a real thing — then you’ve reached the big hurdle of Scaling.
How do you get your rough concept to something that is launched meaningfully and in the field? And then, if that pilot goes well, how do you get it to all the people who might benefit it?
Even if the design process so far has been difficult and demanding, this stage is perhaps the most challenging. Your team will have less control over the direction of your work. You will have to work with more partners and users, who will shape what your initial concept looks like and acts like in the field — and how it is actually used, abused, ignored, or otherwise.
That said, this Scaling phase can be the most thrilling one, because the initial post-it brainstorms and maps of insights pay off into real, live interventions. What started out as one-line ideas begin to become actual things in the world.

So, how do you get from coming up with ideas, playing around with them, and getting feedback on them to actually getting something out into the world with people engaged with them?
This map is one vision of how the design process described above can fit into a longer term development cycle. You use your initial cycle of design work to get a pilot scoped out. Then the pilot implementation (and the testing, iterating, and reflection it generates) will help you figure out what your scaling plan should be. You’ll likely have to edit, pare down, and figure out a better plan of implementation that others, who have not been on your design team’s journey, can replicate.
 It will lead you from idea to a well-planned idea that you can enlist a developer to actually code or build, and then return to you to implement.

Staging Implementation
Once you have vetted a concept design with user testing — you know that there is promise to pursue. Now it’s time to think of what scale and scope your first implementation should be.
Try this exercise: put all your ideal features and functions in the right-side box of ‘Then’. Now scale back to the three, limited features that you can and should implement in the ‘Now’. This will help you figure out how to get a simpler, straightforward version that you can pilot more easily.

Constraints are healthy for your pilot, to help you get to an implementation sooner. It will force you to prioritize what’s core to the value you’re providing.
From that first sketchy staging plan, now be more intentional.
What will go into your pilot? Think about what the core hypothesis it is that you are testing. What is the make-or-break question about whether your idea is worth pursuing or not? Then what should go in a first proper roll-out to a wider audience? And then what is the big vision, the ultimate version of the idea that would satisfy your big ambitions for it?
 This is another refinement of your implementation plan, to get your team to prioritize functions and understand more clearly what value you are offering.
Your Pilot for your Minimum Viable thing
Once you have defined the staging of the features that you’ve been considering for your concept design, the next step is to crystallize your vision of the pilot you will launch. Use this planning canvas to think through the logistics of how you can launch a pilot, and what you need to put in place to support it.
 Along with these logistical details, now is also the time to think about creating a Brand for your design.
To get to a brand, think about experience. When your user comes across your design, and as they interact with it or recount it to friends, what do you want them to experience? What’s the mood, emotion, and message you want to come across to your user?
You can capture this in writing a Brand Promise — a single statement that lays out what brand experience you wish for your users.

This Brand Promise can guide the implementation of your pilot, and the experience it will lead to for your users. It will influence many of the specific details of your design.
- how your content & information is architected
- what the interfaces look like
- what the tone & mood & feel of the thing is
- which will suit the needs of your users
The next chapters go into more detail about these choices for implementation, specifically for legal users. I will lay out the findings we’ve discovered about what makes for a ‘good’ experience of a legal service or product.
[gap size=”100px”]
Tweaking the Design Process for Lawyers
Having laid out the design process for any kind of team to use to tackle any kind of challenge, it’s worth exploring exactly how this can be made useful for lawyers in particular.
I have tried out many variants of the design process I describe above with legal audiences. In these experiments, I have made lots of observations about how we can alter this process to make it both more palatable and more productive for legal types.
Here is my sketched out notes about how to deal with very skeptical and risk-averse people in your design team.

